Indulge in the Irresistible Charm of Cake Pops: A Delectable Recipe to Delight Your Senses!
Cake pops are a delightful and irresistible treat that combines the goodness of cake with the convenience of a lollipop. These bite-sized treats are not only visually appealing but also incredibly delicious, making them a perfect choice for parties, special occasions, or simply as a sweet indulgence. With their charming appearance and endless flavor possibilities, cake pops have become a popular dessert trend that is sure to delight your senses. Whether you are a seasoned baker or just starting out in the kitchen, this delectable recipe will guide you through the process of creating your own batch of cake pops that are guaranteed to impress. So get ready to embark on a journey of culinary artistry and indulge in the irresistible charm of cake pops!
Ingredients for Making Cake Pops
To create these delightful treats, you will need the following ingredients:
1. Cake: Start with a freshly baked cake of your choice. You can use any flavor you prefer, such as chocolate, vanilla, or red velvet.
2. Frosting: To bind the crumbled cake together and add moisture, you will need frosting. Again, choose a flavor that complements your cake, like cream cheese frosting for red velvet or chocolate frosting for chocolate cake.
3. Candy Melts: These are essential for coating the cake pops. Candy melts come in various colors and flavors, making them perfect for adding a pop of vibrancy to your creations.
4. Lollipop Sticks: These sticks will be inserted into the cake balls to create the classic cake pop shape. Make sure they are sturdy enough to hold the weight of the cake pops.
5. Sprinkles and Decorations: Get creative with toppings! Sprinkles, edible glitter, crushed nuts, or even mini chocolate chips can be used to decorate your cake pops.
6. Optional Additions: If you want to add extra flavor or texture to your cake pops, consider incorporating mix-ins like chopped nuts, dried fruits, or cookie crumbs into the cake mixture.
Remember to gather all these ingredients before starting your baking adventure so that you have everything on hand when it's time to make these irresistible treats!
Step-by-Step Instructions for Making Cake Pops
1. Start by baking a cake of your choice according to the recipe instructions. Allow it to cool completely before proceeding.
2. Once the cake is cooled, crumble it into fine crumbs using your hands or a food processor.
3. In a large bowl, combine the cake crumbs with frosting of your choice. Start with a small amount and gradually add more until the mixture holds together when rolled into a ball.
4. Roll the cake mixture into small, bite-sized balls using your hands. Place them on a lined baking sheet and refrigerate for about 30 minutes to firm up.
5. While the cake balls are chilling, melt chocolate or candy melts in a microwave-safe bowl according to package instructions.
6. Dip the tip of each lollipop stick into melted chocolate and insert it halfway into each chilled cake ball.
7. Once all the cake balls are attached to sticks, carefully dip them one by one into the melted chocolate, ensuring they are fully coated. Gently tap off any excess chocolate.
8. Place the coated cake pops back onto the lined baking sheet and decorate them with sprinkles, crushed nuts, or drizzle additional melted chocolate over them for added flair.
9. Allow the chocolate coating to set completely by placing the tray in the refrigerator for about 15 minutes.
10. Once set, carefully remove each cake pop from the tray and place them upright in a decorative stand or foam block for presentation.
11. Serve and enjoy these delightful treats!
Follow these simple steps to create beautiful and delicious cake pops that will surely impress your friends and family!
Tips and Tricks for Perfect Cake Pops
1. Use a cake mix: For convenience, use a boxed cake mix instead of making the cake from scratch. This will save you time and effort.
2. Crumble the cake finely: After baking the cake, let it cool completely before crumbling it into fine crumbs. The finer the crumbs, the easier it will be to shape the cake pops.
3. Add frosting gradually: When adding frosting to the crumbled cake, do so gradually. You want just enough frosting to bind the crumbs together without making them too wet or sticky.
4. Chill before shaping: Before shaping the cake pops, chill the mixture in the refrigerator for at least 30 minutes. This will make it easier to roll them into smooth balls.
5. Use quality chocolate: When dipping your cake pops in chocolate, use high-quality melting chocolate or candy melts for a smooth and glossy finish.
6. Tap off excess chocolate: After dipping each cake pop in chocolate, gently tap off any excess by tapping your wrist with your other hand. This will help create a neat and even coating.
7. Experiment with toppings: Get creative with toppings such as sprinkles, crushed nuts, or edible glitter to add texture and visual appeal to your cake pops.
8. Use a foam block for drying: Stick each finished cake pop into a foam block or Styrofoam while they dry. This will keep them upright and prevent any smudging or flattening of their decorations.
By following these tips and tricks, you'll be well on your way to creating picture-perfect and deliciously irresistible cake pops that are sure to impress!
Variations and Flavor Ideas for Cake Pops
Cake pops are incredibly versatile, allowing you to experiment with different flavors and combinations. Here are some delicious variations to try:
1. Chocolate Lover's Delight: Dip your cake pops in melted dark or milk chocolate and sprinkle with crushed nuts or chocolate shavings for an indulgent treat.
2. Fruity Burst: Add a burst of fruity flavor by mixing finely chopped fresh berries or citrus zest into the cake batter before shaping them into pops.
3. Cookies and Cream: Crush some chocolate sandwich cookies and mix them into the cake crumbs before rolling them into balls. Dip in white chocolate and sprinkle with cookie crumbs for a delightful twist.
4. Peanut Butter Paradise: Incorporate creamy peanut butter into the cake mixture, then dip the pops in melted peanut butter chips for a rich and nutty flavor.
5. Red Velvet Surprise: Use red velvet cake as your base, then insert a small dollop of cream cheese frosting in the center before coating with white chocolate. The surprise filling will delight your taste buds!
6. Matcha Madness: For a unique twist, add matcha powder to your cake batter and dip the pops in white chocolate infused with matcha powder. This combination offers a subtle earthy flavor that is simply divine.
7. Salted Caramel Sensation: Drizzle caramel sauce over your cake pops after dipping them in melted caramel-flavored candy melts. Sprinkle a pinch of sea salt on top for an irresistible sweet-salty contrast.
Remember, these are just a few ideas to get you started! Feel free to unleash your creativity and explore endless possibilities when it comes to flavors and combinations for your cake pops.
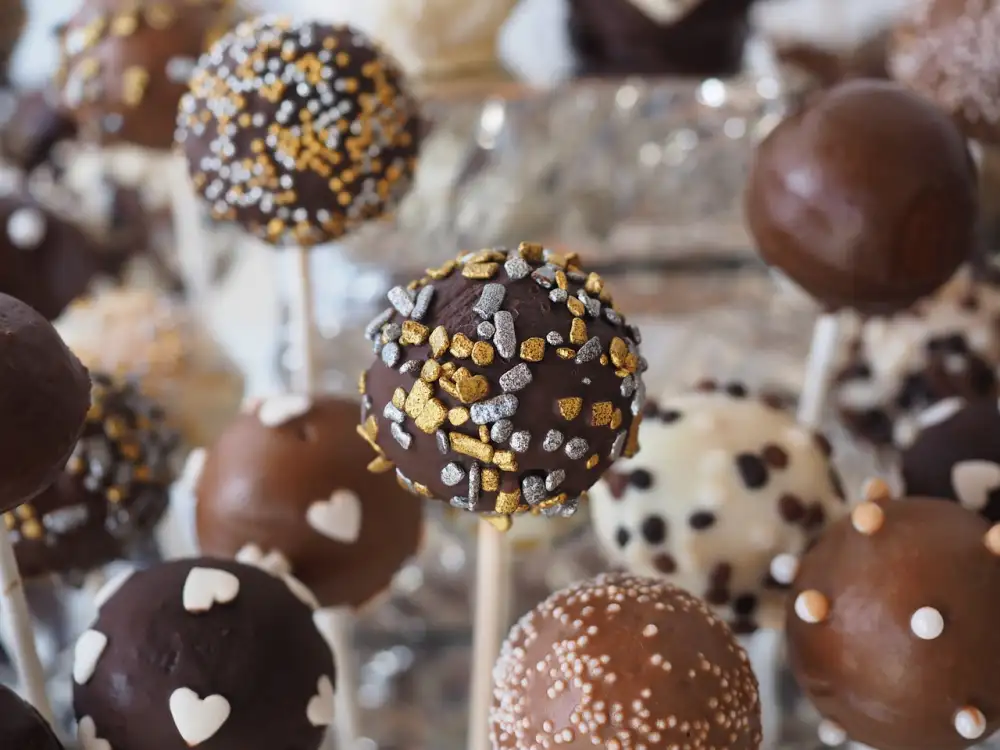
Decorating and Presentation Ideas for Cake Pops
When it comes to decorating and presenting cake pops, the possibilities are endless. Here are some ideas to make your cake pops even more visually appealing:
1. Dip and drizzle: After dipping your cake pops in melted chocolate or candy coating, let them dry slightly and then drizzle with a contrasting color of melted chocolate. This adds a beautiful touch and creates an eye-catching design.
2. Sprinkles and toppings: Roll your cake pops in colorful sprinkles, crushed nuts, or shredded coconut while the coating is still wet. This not only adds texture but also enhances the overall appearance.
3. Edible decorations: Use edible markers or food coloring pens to draw intricate designs on your cake pops. You can create patterns, write messages, or even draw small pictures to personalize each pop.
4. Molds and shapes: Invest in silicone molds that come in various shapes like hearts, stars, or flowers. Pour the melted chocolate or candy coating into these molds and insert the cake pop sticks before they set. This will give your cake pops a unique shape that is sure to impress.
5. Colorful drizzles: Add a pop of color by mixing food coloring into melted white chocolate or candy coating before drizzling it over your cake pops. This creates a vibrant and playful look that is perfect for special occasions.
Remember, presentation is key! Display your beautifully decorated cake pops on a decorative tray or stand to make them the centerpiece of any dessert table.
Serving and Storing Cake Pops
Once your cake pops are ready, it's time to serve and enjoy them! These delightful treats can be served on their own or as part of a dessert platter. Place them upright in a decorative stand or arrange them on a serving tray for an eye-catching display.
To add an extra touch of elegance, you can drizzle melted chocolate or caramel over the cake pops. Sprinkle some colorful sprinkles, crushed nuts, or edible glitter to make them even more enticing.
When it comes to storing cake pops, keep in mind that they are best enjoyed fresh. However, if you have leftovers, store them in an airtight container at room temperature for up to 2 days. For longer storage, refrigerate them for up to 5 days.
To maintain their freshness and prevent any condensation from forming on the surface, place a piece of wax paper between each cake pop before storing. When ready to serve again, allow them to come to room temperature before enjoying their delectable taste and texture.
Remember that cake pops are meant to be savored and shared with loved ones. So indulge in the irresistible charm of these bite-sized delights and let your senses be delighted by their scrumptious flavors and artistic appeal!
In conclusion, cake pops are a delightful and versatile treat that can be enjoyed by people of all ages. Their irresistible charm lies in their bite-sized form and endless possibilities for flavors and decorations. Whether you're making them for a special occasion or simply to indulge your sweet tooth, cake pops are sure to delight your senses.
With the right ingredients, step-by-step instructions, and a few tips and tricks, you can create perfect cake pops every time. Don't be afraid to experiment with different flavors and variations to suit your taste preferences. And when it comes to decorating and presenting your cake pops, let your creativity shine.
Remember to serve your cake pops on a platter or display them in a decorative stand for an eye-catching presentation. And if there are any leftovers (which is rare!), store them in an airtight container to keep them fresh.
So go ahead, indulge in the irresistible charm of cake pops and let their delectable taste bring joy to your senses!
Published: 30. 12. 2023
Category: Recipes